I love family. I love learning. I love food. This is simply a collection of thoughts, memories, and recipes that are a piece of me!

Wednesday, June 8, 2016

Baked Omelet.

Lately, I have been in a real "simple meals" rut.  My kids have eaten peanut butter and syrup sandwiches far more than I'd like to admit, and they haven't always just been for lunch.

They've had them for breakfast.

And then again for dinner.

Once they had them twice in one day.  I'll take that "Mom of the Year" trophy now, please.

I've been so busy lately, and the first thing to ditch from my list is almost always a sit down real deal meal.  Although I'm a big proponent of the family dinner time, sometimes it just isn't an option if that means Mommy taking the hour before dinner is to be served artfully prepping and cooking a meal for the ages.

So instead, we sit together and eat sandwiches, and though I don't mind this sometimes, I make a meal plan every month with a menu all pretty and written up on a chalkboard hanging in my dining room.  And the kids notice when I have spent days and days not erasing anything from that menu.

I try to write down simple meals most of our days anyway, but this month, we had "Brinner" twice on our menu board.

Brinner is a big deal at our house.  Breakfast for dinner?  Yes, please.  It's one of the few nights where everyone in our family will eat without a whine or whimper.  French toast, pancakes, biscuits and gravy, eggs, bacon....there are so many yummy options when it comes to brinner.

The problem, however, is that it is never ever ever simple.  Flipping pancakes, scrambling eggs, and frying bacon takes real time, and so as much as we love it, I started putting it off or skipping those nights all together because I just didn't have the time or energy to devote to standing in front of my stove doing fifteen things at once.

Enter: baked omelets.

I can't even tell you how much I love this idea.  I'm not even calling it a recipe because really, what I put in it may not float your boat, and that's totally fine.  My family goes pretty simple with omelets- just ham and cheese.  Just add in whatever your family loves in an omelet (spinach, mushrooms, peppers, onions...), and brinner will magically become a quick, simple, weeknight meal!

What you will need:
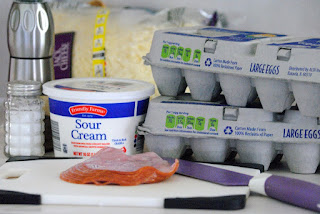
1 1/2 cups of grated cheese
several slices of deli ham
8 large eggs
1 1/2 tbsp sour cream
salt and pepper to taste

Preheat your oven to 400, and spray an 8x8 glass baking dish with nonstick spray.

Lay out a layer of cheese in the bottom of the dish.  This will brown slightly while it bakes and make a heavenly crust on the bottom.  Chop up the ham into bite sized pieces and sprinkle on top of the cheese.

In a separate bowl, beat together your eggs, sour cream, and salt and pepper until they are pale yellow and a homogeneous mixture.  I will add here that I always make my scrambled eggs with sour cream.  Even if you don't try this "recipe," you should give that a shot.  It makes them so fluffy and delicious!  Pour the eggs on top of the ham and cheese.

Bake at 400 for 35 minutes, or until the center is set.  The eggs will puff up and make a creamy, fluffy pan of omelet.  This is great along with some pancakes or biscuits and gravy, and it was a huge hit with my kiddos.
Welcome back to our lives, brinner.  We have missed you.

Friday, June 3, 2016

Pretzel Bites.

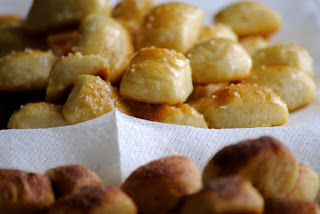
I don't know about you guys, but dreary weather turns me into the most avid baker.  Bread for dinner.  Cinnamon rolls for breakfast, pizza crust for lunch, and my newest favorite thing to bake: pretzel bites for a fun afternoon snack.

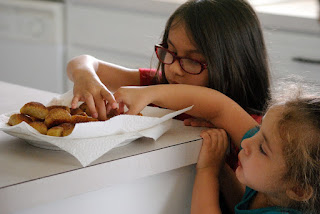
Or an entire batch for lunch, if you're me.  Whatever.

I'm relatively new to the soft pretzel game, having just been introduced to them in a meaningful way a few months ago- at Sam's Club of all places.  I figured if I like them at Sam's, they had to be a million times better if I made them at home, and I was very very right.

If you Google "how to make soft pretzels," it's pretty easy to get overwhelmed.  Lye? Baking soda bath? Salt that isn't from the salt shaker on my table?  And what's with that twisting?  No thanks.

But really, it's not hard at all.  And I didn't use any lye.  It's a few steps, but honestly, these are so much quicker than many of the other bread products I make, and it's totally worth the little bit of effort.

What you'll need:
2 1/2 cups of flour
1 tsp of salt
1 1/2 tsp of sugar
2 1/2 tsp (or one packet) of dry active yeast
1 cup of water as hot as you can get it from the tap

1 1/2 cups of boiling water
3 tbsp of baking soda
Course sea salt and/or a cinnamon/sugar mixture
at least 1 stick of butter, but I use more

First, add those first five ingredients to the bowl of a stand mixer.  Mix until they're all combined then knead on medium speed for 5-6 minutes.

Your dough will be smooth and slightly sticky.  Oil a bowl and give your dough a few turns in it to coat it, and let it rest for 20-30 minutes.

While your dough is resting, boil the cup and a half of water.  As soon as it comes to a boil, turn off the heat and add the baking soda.  Be aware: this bubbles up somewhat violently.  It's fun to watch, though, so invite the kids in for this part!  Let this mixture cool as your dough rests.

I will add here that some recipes tell you to put the dough into this mixture as it's boiling, and some say dip the dough in after the water has cooled.  I tried both, and it really had the same outcome...so I'm going for the simplest option.

Preheat your oven to 400.

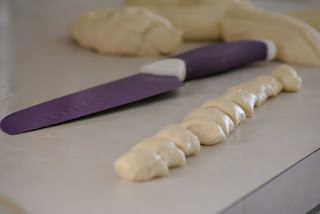
Once the dough has taken a little nap, cut it into a few pieces.  I usually do 5 or 6 big chunks, but it doesn't matter much how many as long as the ropes you make from these chunks end up the same width.  Then, using the palms of your hands, gently roll the chunks of dough into long strips about an inch and a half wide.  The length will just depend on how big of a chunk of dough you started with.  I usually spray my counter to keep them from sticking, but I never ever flour it because you don't want this dough drying out.

Cut the strips into bite sized pieces.

Pour your baking soda mixture into a pie plate and drop in the dough bites.  Let them set, turning if they aren't completely covered, for a minute or so.  There's some science happening here, and it has something to do with the pH of the dough.  I just know this is what makes the outside all chewy and pretzel-like.

Place the bathed dough bites on a parchment AND sprayed cookie sheet.  If you want to actually get them off once they are cooked, I highly recommend both.  I speak from experience here. 

If you're going to make salty pretzel bites, add your course sea salt to the top now.  If you're going for the cinnamon sugar variety, hold off on any toppings.

Bake at 400 for 10-11 minutes, until beautifully golden.

While the pretzels are baking, melt your butter.  Now, normally when I bake, I use unsalted butter, but this is one instance where that salt makes a big difference.  Feel free to use unsalted if you prefer, but I've tried both, and let me tell you, that salt is noticeably missing if you don't use it.  If all you have is unsalted butter, add 1/4 tsp of salt to the butter as it's melting.

Now that you mention it, I bet you could add a lot of yummy stuff...like garlic powder and then top the pretzels with Parmesan cheese...mmmm.  ..but I digress.

Once the little golden nuggets of deliciousness are out of the oven, while they're still warm, roll them in the melted butter.  If you wanted the cinnamon sugar topping, sprinkle it on after the pretzels come out of their butter bath.  If you're just going with the traditional salted option, the butter is the last step.  Make sure to set them on a paper towel to catch any dripping butter.

I prefer mine warm, but these little bites of joy are delicious any time.

Now here's to all this rain...and all this yummy baking!